Unlock the Magic of Authentic Thai Coconut Sweet Sticky Rice: The Ultimate Guide
There are few desserts that capture the essence of Thai culinary artistry quite like
Thai coconut sweet sticky rice. Known globally as Khao Niao Mamuang when paired with ripe mango, this iconic dish is a symphony of textures and flavors that has captivated palates worldwide. Imagine perfectly tender, chewy glutinous rice, bathed in a rich, sweet-salty coconut cream, often enhanced with subtle aromatic notes, and then served alongside the luscious sweetness of fresh fruit. It's a dessert that transcends simple satisfaction, offering a truly unforgettable experience.
For many, the first encounter with Thai mango sticky rice is a revelation. The initial skepticism gives way to pure delight with the first spoonful: the warmth of the rice, the creamy richness of the coconut sauce, and the refreshing sweetness of the mango creating a perfect harmony. This dish isn't just a dessert; it's a journey for the senses, surprisingly easy to recreate at home once you understand a few key principles – primarily, the critical role of glutinous rice and its proper preparation.
The Irresistible Allure of Thai Coconut Sweet Sticky Rice
What makes
Thai coconut sweet sticky rice so universally beloved? It's a masterful balance of contrasting elements. The rice itself, often gently warmed, provides a satisfyingly chewy, yet tender base. This is then drenched in a luxurious sauce made from coconut milk, a touch of sugar (or sweetener), and a pinch of salt. This sweet-salty concoction transforms the neutral rice into a creamy, aromatic delight that is utterly addictive.
When paired with the juicy, floral notes of ripe mango, the dish reaches its peak. The freshness of the fruit cuts through the richness of the coconut, creating a dynamic interplay that leaves you craving more. But the beauty of this dessert extends beyond mango; it’s a versatile base that pairs wonderfully with a variety of fresh fruits, making it a refreshing, naturally gluten-free, and often vegan treat that's perfect for any occasion. Many versions are also available with reduced sugar, making it an even healthier option for those mindful of their intake. For more on creating healthier versions, check out our guide on
Healthy Thai Sticky Rice: Low-Sugar, Vegan & Gluten-Free Dessert.
The Heart of the Dish: Understanding Glutinous Rice
The very foundation of an authentic
Thai coconut sweet sticky rice lies in using the correct type of rice. This isn't just any rice; it's specifically "glutinous rice," also known as "sweet rice" or "sticky rice." It's crucial to note that despite its name, glutinous rice does *not* contain gluten. The term "glutinous" refers to its sticky, glue-like texture when cooked, a characteristic attributed to its exceptionally high amylopectin content and very low amylose content compared to other rice varieties like jasmine or basmati.
When shopping, look for bags labeled "Thai sweet rice," "glutinous rice," or "sticky rice." The grains themselves are typically opaque, unlike the translucent appearance of jasmine rice. You might find both white and black glutinous rice varieties. Both work beautifully for this dessert, with black sticky rice offering a slightly nuttier flavor and a striking purple hue that adds visual appeal. Using the correct rice variety is non-negotiable for achieving the signature tender, chewy, and cohesive texture that defines this classic Thai dessert. Without it, your "sticky rice" simply won't be sticky enough.
Mastering the Soaking Process: Your First Step to Perfection
One of the most vital, yet often overlooked, steps in preparing authentic
Thai coconut sweet sticky rice is the initial soaking of the glutinous rice. This isn't just a recommendation; it's a mandatory prerequisite for achieving the perfect texture. Skipping this step will result in rice that is either undercooked, unevenly cooked, or simply not sticky enough.
Why Soaking is Crucial:
- Grain Expansion: Soaking allows the individual grains to swell and hydrate evenly from the inside out. This pre-softens the rice, significantly reducing cooking time.
- Even Cooking: Hydrated grains cook more uniformly, preventing hard centers or mushy exteriors.
- Optimal Texture: The pre-hydration is key to unlocking the characteristic tender, yet chewy and distinctly sticky texture that is the hallmark of true glutinous rice. It helps the starches to gelatinize correctly during steaming.
How to Properly Soak Glutinous Rice:
- Rinse First: Begin by rinsing your glutinous rice under cold running water several times until the water runs mostly clear. This removes excess starch, which can make the rice too gummy.
- Submerge: Place the rinsed rice in a large bowl and add a generous amount of fresh, cool water, ensuring the rice is fully submerged by at least an inch or two.
- Soak Time: This is where patience pays off. Aim for a minimum of 4-5 hours. For the absolute best results, soaking the rice overnight (8-12 hours) is highly recommended. While you might be tempted to rush, avoid soaking for less than 2 hours if possible, as it significantly compromises the final texture.
- Drain and Rinse Again: Once soaked, carefully drain the water. Give the rice one final quick rinse to ensure any remaining loose starch is gone. Your rice is now primed and ready for steaming! (As a side note, the soaking water can be surprisingly beneficial for watering your house plants!)
Beyond Soaking: Steaming & Aromatic Enhancements
With your perfectly soaked glutinous rice, the next step is the actual cooking process: steaming. Unlike other rice varieties, glutinous rice is traditionally steamed, not boiled. This method ensures each grain retains its integrity while becoming perfectly tender and sticky, avoiding the mushiness that boiling can cause.
Steaming Methods:
- Traditional Steamer Basket: A bamboo steamer placed over a pot of simmering water, often lined with a cheesecloth or banana leaf, is the authentic method. This allows steam to circulate evenly around the grains.
- Sieve and Cheesecloth: If you don't have a traditional steamer, you can improvise by lining a fine-mesh sieve with cheesecloth and placing it over a pot of simmering water, ensuring the water doesn't touch the rice.
- Modern Appliances: Many rice cookers come with a steaming function or basket, and an Instant Pot can also be used effectively for steaming. These methods offer convenience without sacrificing quality. For a deeper dive into various steaming techniques, refer to our article on Easy Thai Coconut Sticky Rice: Steaming Methods & Glutinous Rice Tips.
Infusing Authentic Flavors: Pandan Leaves
To elevate your
Thai coconut sweet sticky rice to another level of authenticity and aroma, consider adding pandan leaves during the steaming process. Pandan, often referred to as "the vanilla of Southeast Asia," imparts a unique, subtly sweet, and floral fragrance that is deeply comforting. Simply tie a few pandan leaves into a knot and place them directly with the rice in the steamer. While not strictly necessary, it adds an incredible layer of flavor that truly sets homemade sticky rice apart. Pandan leaves can typically be found fresh or frozen in Asian grocery stores.
Crafting the Coconut Cream Mixture:
Once your rice is beautifully steamed and still hot, it's time for the magical transformation. In a separate saucepan, gently heat full-fat coconut milk (or coconut cream for extra richness) with your choice of sweetener (cane sugar, maple syrup, or a low-sugar alternative) and a pinch of salt. The salt is crucial, as it balances the sweetness and enhances the overall flavor profile. Ensure the mixture is warm, not boiling hot. Once combined, pour this luscious coconut sauce over the hot steamed rice. Gently fold it in, allowing every grain to soak up the rich, sweet-salty goodness. Cover the bowl and let it sit for 10-15 minutes, allowing the rice to fully absorb the sauce and become wonderfully glossy and tender.
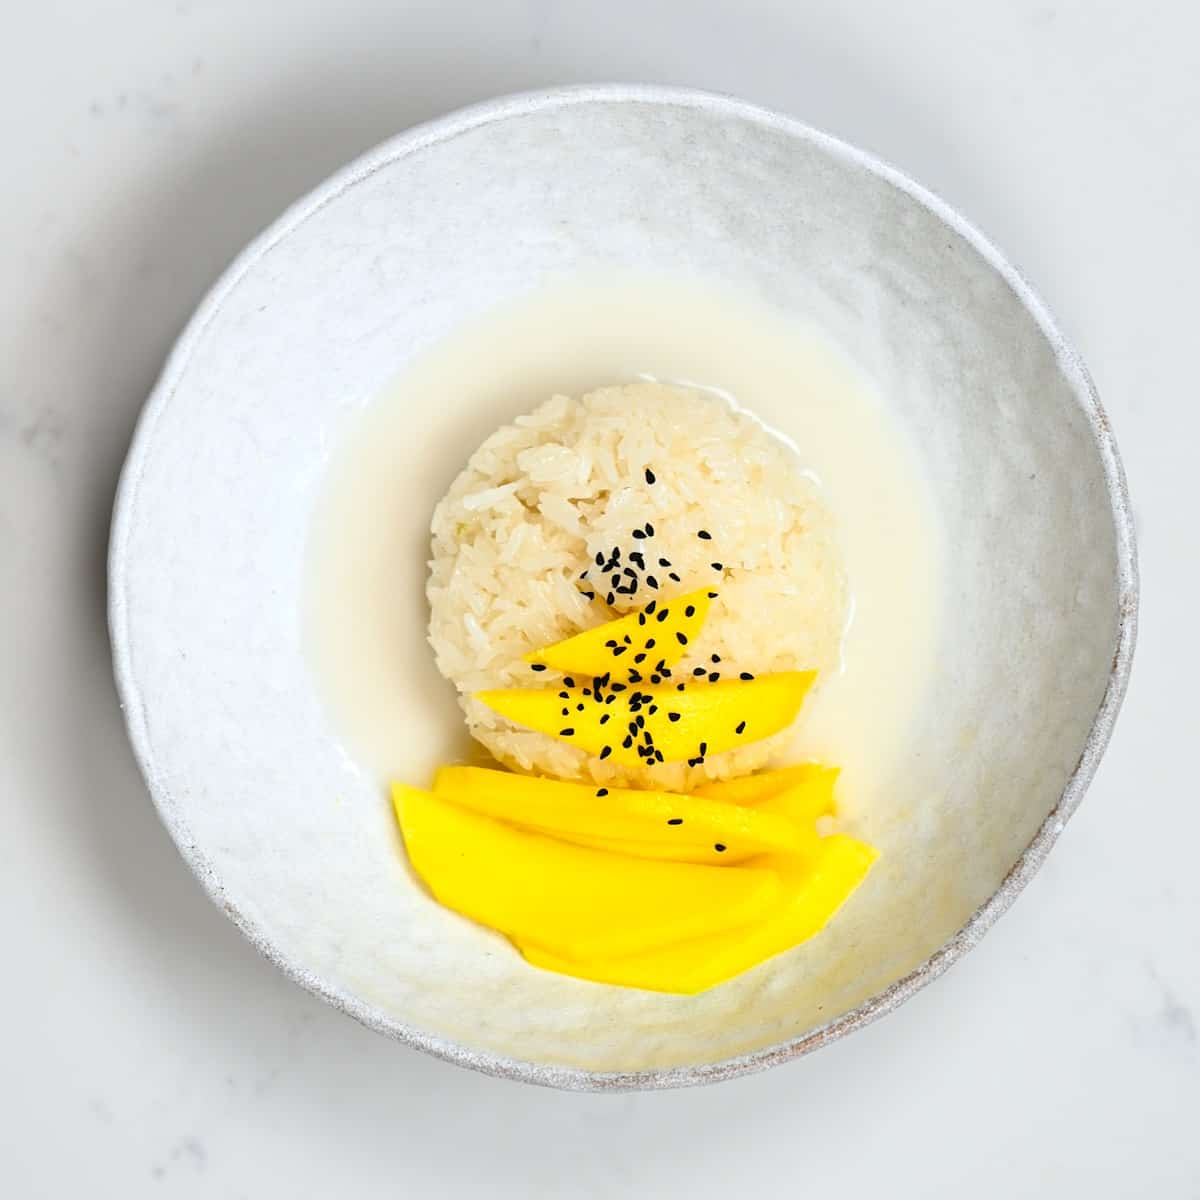
Serving Your Perfect Thai Coconut Sweet Sticky Rice
The classic pairing for
Thai coconut sweet sticky rice is, of course, fresh, ripe mango, creating the beloved Khao Niao Mamuang. Choose mangoes that are fragrant, slightly soft to the touch, and vibrant in color for the best flavor. Peel and slice them artfully to accompany the glistening rice.
Beyond mango, feel free to experiment with other fruits like sweet papaya, succulent durian (for the adventurous!), or even fresh berries for a refreshing twist. For an added touch of elegance and crunch, garnish your dessert with toasted sesame seeds or crispy fried mung beans, and perhaps a drizzle of extra coconut cream.
This humble yet extraordinary dessert proves that with the right ingredients and attention to detail, especially to the foundational steps of selecting and soaking glutinous rice, you can bring the authentic flavors of Thailand right into your home kitchen.
Conclusion
Creating perfect
Thai coconut sweet sticky rice is a rewarding culinary journey that demystifies a beloved classic. By understanding the unique properties of glutinous rice and meticulously following the crucial soaking and steaming steps, you unlock a depth of flavor and texture that is unparalleled. This dish isn't just a dessert; it's an experience – a harmonious blend of sweetness, creaminess, and tender chewiness that truly rocks the world of anyone who tries it. So, grab your glutinous rice, set your soaking timer, and prepare to indulge in a homemade treat that tastes straight out of Thailand.