Discover the Magic of Healthy Thai Coconut Sweet Sticky Rice
Imagine a dessert that's both decadently creamy and wonderfully refreshing, yet surprisingly healthy, vegan, and gluten-free. That's the enchanting promise of Thai coconut sweet sticky rice. This beloved Thai culinary treasure, known traditionally as Khao Niao Mamuang when paired with mango, offers an unparalleled sensory experience. It's a symphony of textures and flavors, where warm, tender glutinous rice generously soaks up a sweet, salty, and incredibly rich coconut sauce. And the best part? We're exploring a low-sugar version, making it an even healthier indulgence for any time of day.
For many, the first encounter with Thai sticky rice is nothing short of magical. I still vividly recall my initial taste at a bustling London restaurant – a skeptical curiosity quickly transformed into pure delight. The way the lusciously sweet coconut milk permeated every grain of warm, soft rice was a revelation. Combined with the vibrant freshness of ripe mango, it was a dessert that truly rocked my world, making me crave a second serving despite having just finished a full meal!
This article will guide you through crafting this extraordinary dessert right in your own kitchen. Whether you're a seasoned chef or a curious beginner, you'll learn the secrets to achieving that perfect chewy texture and rich flavor, all while keeping it health-conscious, vegan, and naturally gluten-free.
Crafting Your Healthy Thai Sticky Rice: The Essential Ingredients & Low-Sugar Twist
The beauty of Thai coconut sweet sticky rice lies in its simplicity, relying on a few high-quality ingredients to create something truly exceptional. However, to make it a healthier, low-sugar option, we'll make a clever swap without compromising on taste.
The Star: Glutinous Rice
The foundation of this dish is, of course, the rice itself. It's crucial to understand that "sticky rice" refers to a specific variety of rice, not just a cooking method. For the authentic texture, you must use glutinous rice, also known as 'Thai sweet rice'. Look for bags labeled as such; the grains are typically opaque. This unique rice contains a high amount of amylopectin, which gives it its characteristic stickiness and chewiness when cooked correctly. Both white and black glutinous rice varieties work wonderfully, offering slightly different visual and textural nuances. Using the correct rice is absolutely key to achieving the desired tender, glossy, and never mushy consistency that defines this dessert.
The Creaminess: Coconut Milk
For that signature richness, full-fat coconut milk is indispensable. It's the heart of the creamy sauce that transforms the rice. While light coconut milk might seem like a healthier option, it often lacks the body and luxurious mouthfeel needed for a truly satisfying dessert. Prioritize quality coconut milk for the best results.
The Sweetness (and our Healthy Twist!)
Traditionally, cane sugar provides the sweetness. However, to make our version healthy and low-sugar, we can substitute it with alternative sweeteners. Options like erythritol, stevia, or monk fruit are excellent choices, providing sweetness without the added calories or glycemic impact of traditional sugar. You can adjust the amount to your preference, ensuring a delightful sweetness that complements the coconut without overwhelming it. Remember to add a pinch of salt – this tiny addition is vital for balancing the sweetness and enhancing the overall flavor profile.
Optional Aromatic Enhancements
For an extra layer of authentic Thai-inspired flavor, consider adding a pandan leaf during the rice steaming process. Pandan leaves impart a beautiful, subtle vanilla-like aroma and a hint of green hue to the rice, elevating the dish to another level of authenticity. While not strictly necessary, it's a wonderful addition if you can find it. You might also consider a touch of vanilla extract if pandan isn't available.
Mastering the Art of Sticky Rice: Soaking, Steaming, and Saucing
Making Thai coconut sweet sticky rice is surprisingly straightforward once you understand a few key steps. The secret lies in proper preparation, especially with the rice.
Step 1: The Non-Negotiable Soak
Do NOT skip this step! Soaking the glutinous rice is paramount for achieving the perfect texture. This allows the grains to swell slightly and become uniformly pliable, leading to that characteristic chewy-yet-tender consistency. Without soaking, the rice will be hard, dry, and lack the desired stickiness.
- Add your glutinous rice to a large bowl and submerge it completely in water.
- Soak for a minimum of 4-5 hours, or ideally, overnight. In a pinch, you *might* get away with two hours, but the longer soak yields superior results.
- Once soaked, drain the rice thoroughly and rinse it under cold water until the water runs clear. This removes excess starch, preventing the rice from becoming gluey rather than perfectly sticky.
Step 2: The Art of Steaming (Not Boiling!)
This is another critical distinction: glutinous rice should always be steamed, never boiled. Boiling can make the rice mushy and inconsistent. Steaming ensures even cooking, allowing the grains to expand beautifully while maintaining their distinct shape and chewiness. While traditional methods often employ a bamboo steamer basket lined with a banana leaf or cheesecloth, don't fret if you don't have one. Many household items can be adapted!
- Traditional Steaming: Place a banana leaf or cheesecloth inside a steamer basket set over a pot of simmering water (ensure the water doesn't touch the rice). Spread the soaked and rinsed rice evenly on top. Steam for 20-30 minutes, or until the rice is tender and translucent. You can find more alternative steaming methods in our detailed guide: Easy Thai Coconut Sticky Rice: Steaming Methods & Glutinous Rice Tips.
- Pandan Infusion (Optional): If using pandan leaves, tie one or two into a knot and place them directly on top of the rice while steaming for an aromatic infusion.
Step 3: The Creamy Coconut Embrace
While the rice is steaming, prepare your delicious low-sugar coconut sauce:
- In a saucepan, gently heat the coconut milk with your chosen low-sugar sweetener and a pinch of salt. Stir until the sweetener and salt are fully dissolved. Do not boil the coconut milk, just warm it through.
- Once the rice is cooked, immediately transfer it to a large bowl. Pour about two-thirds of the warm coconut sauce over the hot rice.
- Gently fold the sauce into the rice using a spoon or spatula, ensuring every grain is coated. Cover the bowl and let it sit for at least 15-20 minutes. This allows the rice to fully absorb the flavorful coconut milk, becoming wonderfully tender and infused. This resting period is crucial for the transformation!
Serving Suggestions & Creative Variations for Your Thai Coconut Sweet Sticky Rice
Your beautiful batch of healthy Thai coconut sweet sticky rice is now ready to be enjoyed! While it's fantastic on its own, here are some classic and creative ways to serve it:
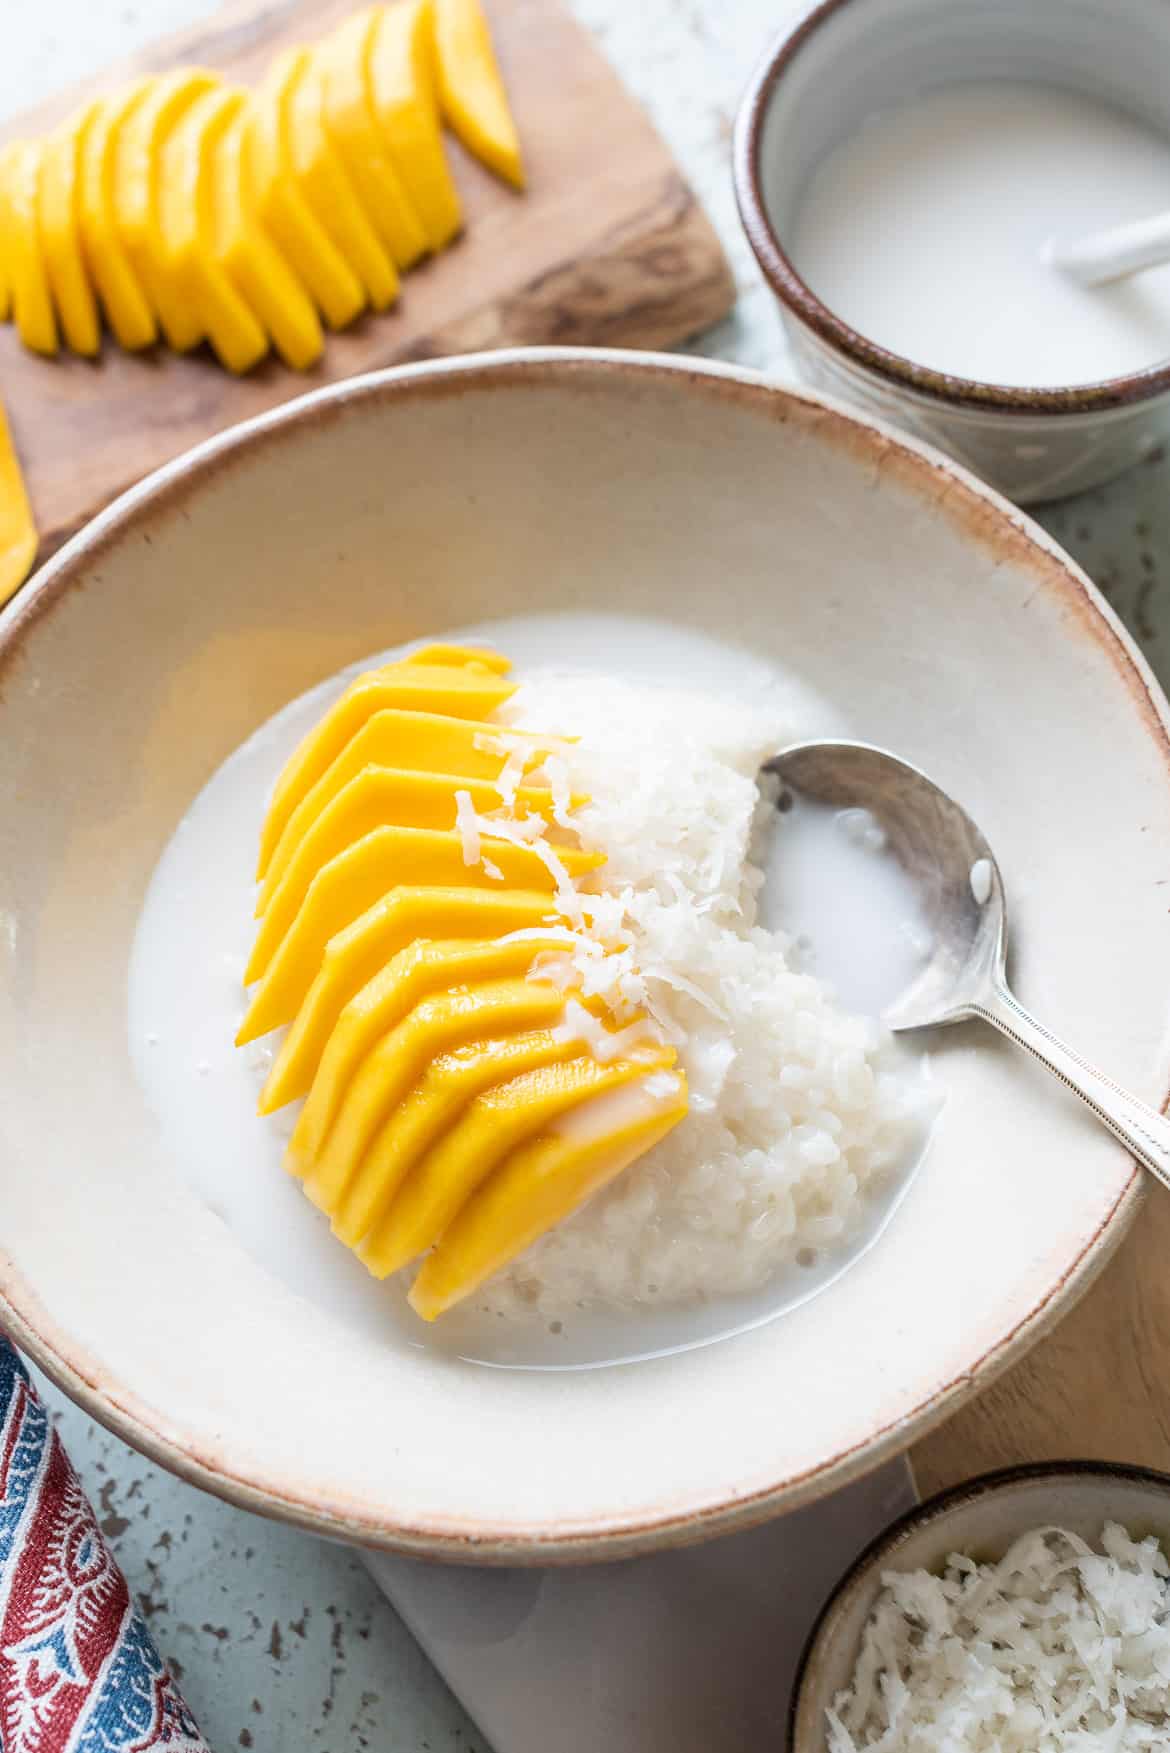
- The Classic: Mango Sticky Rice (Khao Niao Mamuang)
This is arguably the most famous pairing. Serve generous scoops of the warm sticky rice alongside slices of perfectly ripe, sweet mango. The refreshing acidity and vibrant sweetness of the mango provide a brilliant contrast to the rich, creamy rice. Look for mangoes that are slightly soft to the touch and fragrant. - Fruit Fantasia
Don't limit yourself to mango! This dessert pairs wonderfully with a variety of fresh fruits. Try it with juicy berries, tangy kiwi, grilled pineapple, or even dragon fruit for a stunning presentation. The key is to choose fruits that offer a refreshing counterpoint to the richness of the coconut rice. - The Finishing Drizzle
The remaining one-third of your coconut sauce can be thickened slightly to create a luxurious drizzle. Simply whisk a small amount of tapioca starch or cornstarch (corn flour) with a tablespoon of cold water, then stir it into the simmering sauce until it thickens slightly. Drizzle this over your plated sticky rice and fruit for an extra flourish and a boost of coconut flavor. - Toasted Sesame Seeds or Mung Beans
For added texture and a hint of nuttiness, sprinkle a few toasted sesame seeds or crispy fried mung beans over the top just before serving.
Why This Low-Sugar, Vegan Treat is a Must-Try
Embracing this low-sugar, vegan, and gluten-free version of Thai coconut sweet sticky rice means you can indulge in a truly exotic and satisfying dessert without any guilt. It’s a testament to how traditional flavors can be adapted to fit modern, health-conscious lifestyles without sacrificing authenticity or deliciousness. The combination of its creamy texture, rich flavor, and refreshing fruit accompaniments makes it the perfect ending to any meal, or even a delightful snack.
So, gather your ingredients, follow these simple steps, and prepare to transport your taste buds to the vibrant streets of Thailand. This homemade thai coconut sweet sticky rice is not just a dessert; it's an experience waiting to be savored.
